Have you ever looked at a photo and thought, “Wouldn’t it be fun if this turned into a cartoon?” Whether it’s a cherished family picture, a scenic landscape, or your pet striking a pose, transforming photos into cartoon-style images adds a playful twist to any snapshot. Not only does this creative process unleash your artistic side, but it also leaves room for some good laughs and light-hearted joy. Let’s dive deep into this fun and fascinating journey from photo to cartoon!
The Magic of Cartoonizing Photos
Cartoonizing photos isn’t just about altering images; it’s about breathing new life into them! Cartoons are whimsical, exaggerated, and colorful representations that can capture the essence of a moment in an entirely different way. Imagine your serious portrait morphing into a playful caricature or a mundane snapshot turned into a colorful comic scene. The beauty of this transformation lies in creativity, simplicity, and the joy it brings!
Tools You’ll Need
Before diving right into the cartoon-making process, you’ll want to gather the necessary tools. Here’s a handy list:
- Photo Editing Software: Programs like Adobe Photoshop, GIMP, or online tools like PhotoCartoon.net.
- Digital Drawing Tablet (optional): If you’re looking to illustrate your cartoon by hand, a tablet can provide a smooth drawing experience.
- Basic Art Supplies (if going traditional): Pencils, markers, and paper for sketching your cartoon.
Step-by-Step Guide to Cartoonizing a Photo
Ready to turn those photographs into something uniquely amusing? Here’s a simple step-by-step guide to follow.
Step 1: Choose Your Photo Wisely
The first step is to pick a photo that speaks to you! Whether it’s a lively photo of friends laughing or a serene shot of nature, the subject matters. Try to choose an image with clear features where a cartoon style can shine. Portraits work particularly well!
Step 2: Use the Right Software
Open your chosen photo in your preferred photo editing software. Familiarize yourself with its interface; explore tools like layers, brushes, and filters. If you’re new to editing, consider following online tutorials specifically tailored to cartoon effects.
Step 3: Make a Duplicate Layer
Before making any alterations, duplicate your original image layer. This way, you can always return to the untouched version if you need to start over!
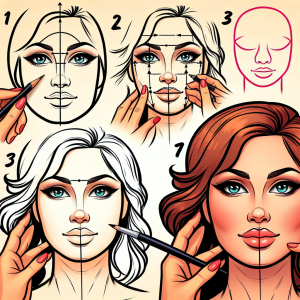
Step 4: Create a Line Art Base
Using a fine brush tool or the pen tool, trace over the outlines of your image. This includes facial features, hairlines, and some prominent background elements. Don’t stress about perfection; the beauty of cartoons lies in their playful imperfections!
Step 5: Add Color
Now comes the fun part! Fill in your line art with vibrant colors. Take your time selecting shades – skin tones, eye colors, and hair colors can yield a myriad of combinations. Feel free to get whimsical with the color choices; after all, it’s a cartoon!
Step 6: Shading and Highlights
Add depth to your cartoon by incorporating shadows and highlights. Use darker shades for shadows and lighter tones for highlights to give your character a three-dimensional appearance. A little additional effort here can take your cartoon from flat to fabulous!
Step 7: Final Touches
Review your work for any additional adjustments. This could include cleaning up the line art, adjusting colors, or adding fun elements like hats, glasses, or speech bubbles. Personalizing the cartoon can elevate the artwork even further!
Digital vs. Traditional Methods
As you explore cartooning, you may wonder whether to go digital or stick with traditional art. Both approaches have their merits, and choosing your path can ignite a creative spark!
Digital Cartooning
Taking the digital route offers efficiency and versatility. You can easily undo mistakes, layer different components, and produce high-quality images suitable for various formats. Software like Adobe Illustrator and free options such as Krita allow for smooth, precise drawings. However, digital cartooning can come with a learning curve, especially if you’re navigating new tools.
Traditional Cartooning
On the other hand, traditional cartooning promotes hands-on creativity. All you need are a few art supplies, and you can take your work anywhere! Using markers, colored pencils, or even watercolors brings a unique texture and feel to your artwork. This method can take more time, and mistakes are harder to correct, but oh, the joy of holding a physical piece of art is unmatched!
Tips for Creating Stunning Cartoons
Creating eye-catching cartoons can feel like a daunting task, but with a few handy tips, you can elevate your artwork to new heights!
- Study Cartoons: Look at various cartoon styles to find inspiration. Pay attention to how artists portray expressions, gestures, and features.
- Experiment with Styles: Try out different cartoon styles, from minimalistic designs to exaggerated characters. Embrace your unique flair!
- Practice Makes Perfect: Don’t expect perfection right away. The more you draw, the more you learn about proportions, colors, and shadowing.
- Get Feedback: Share your work with friends or fellow artists. Constructive feedback can provide new insights and help you improve.
- Have Fun: Above all, enjoy the process! Creating should be pleasurable, freeing, and immensely satisfying.
The Growing Popularity of Cartoonizing
In recent years, cartoonizing images has gained traction in various sectors. From social media filters to digital art platforms, showcasing cartoon versions of images has never been easier! A few reasons behind this trend include:
- Personal Branding: Many influencers and brands use cartoon avatars to create a recognizable online presence.
- Marketing Campaigns: Companies utilize playful images to engage with their audience and convey messages in a fun way.
- Gift Ideas: Cartoon portraits make for unique gifts; imagine giving your friend a fun caricature of themselves!
- Art Therapy: Cartooning can serve as a creative outlet for stress relief and self-expression.
Conclusion: Embrace Your Cartoon Side!
Transforming photos into engaging cartoons is a delightful process that unleashes creativity, bringing a smile to your face and others. Whether you choose to do it digitally or traditionally, the journey of cartoonizing invites a sense of play and exploration. So, gather your photos, grab your tools, and let your imagination run wild as you take a trip into the whimsical world of cartoons!
Frequently Asked Questions
Can I cartoonize any type of photo?
Yes, most types of photos can be cartoonized! However, images with clear features and good lighting work best. Portraits, landscapes, and pet photos are particularly popular choices.
What software is best for beginners in cartooning?
For beginners, user-friendly software like Canva or free tools like PhotoCartoon.net can be excellent starting points. GIMP is also a great option for those wanting to delve into more detailed editing without the cost of paid software.
Is it necessary to have artistic skills to cartoonize photos?
Not at all! Many software programs and online tools offer automated features that can help transform your photos into cartoons with minimal artistic skill. As you advance, however, developing your drawing skills can enhance your creations.
How long does it take to learn how to cartoonize photos?
The learning curve varies for each individual. Some may grasp the basics within a few hours, while others might take longer to master specific techniques. Regular practice will certainly expedite your learning process!
Can I use cartoonized images for commercial purposes?
This depends on the source of your original images and the style of cartoon. If you’re using free-to-use photos and software, ensure you read their licensing agreements. When in doubt, it’s wise to create original content or seek permissions as necessary.


+ There are no comments
Add yours